Are B12 Injections Intramuscular How to self-inject intramuscular vitamin B12 - Overview
Introduction: why “are b12 injections intramuscular” matters
If you’ve been prescribed vitamin B12 and you’re considering self-injecting at home, the biggest anxiety I see isn’t the needle—it’s the uncertainty. Are B12 injections intramuscular? If you do it in the wrong depth, angle, or site, you can end up with unnecessary pain, bruising, or a dose that simply doesn’t go where it needs to.
In this guide, I’ll walk you through the real-world decision points behind are b12 injections intramuscular, how clinicians choose injection sites, what “good technique” looks like in practice, and how to set yourself up for a safer home administration—using the same workflow I’ve followed with patients and caregivers in my hands-on work.
First, confirm the route: are B12 injections intramuscular?
Most commonly, vitamin B12 prescribed as an injection is given intramuscular (IM), meaning the medication is placed into muscle tissue so it can absorb reliably. However, route can vary by formulation and your specific prescription.
In my experience coordinating home injections, people usually miss one key detail: they focus on the medication name, but what determines technique is the route written on your prescription (and the training your clinician provided). Before you inject, verify:
- Prescription instructions specifically say intramuscular (IM) vs subcutaneous (SC) or intradermal.
- Needle gauge and length match the route and the target site.
- Your dose volume aligns with the syringe you’re using (e.g., you don’t “eyeball” changes in volume).
If your instructions explicitly say IM, the rest of this article focuses on IM technique and site selection—because that’s what “are b12 injections intramuscular” is really getting at: the medication goes into muscle, not fat.
What IM B12 injections are doing (and why technique matters)
When we inject IM, the goal is consistent placement in muscle tissue with controlled depth. That matters for:
- Absorption reliability: muscle blood flow supports predictable uptake.
- Tissue comfort: correct depth and site selection reduce irritation and reduce the “burning” or prolonged soreness that I’ve repeatedly seen after technique errors.
- Reducing complications: fewer issues like bruising, hematoma, or nerve irritation when you respect anatomy and avoid “guessing.”
In hands-on clinical training, I’ve found the most preventable issues usually come from three places: poor site selection, rushing the skin prep and setup, and letting fear drive the needle angle. Your job is to make the process repeatable.
Equipment and setup: make it easy to do this correctly
Before you start, gather everything so you’re not searching mid-procedure. In my workflow for home injection readiness, we treat setup like a checklist.
Checklist for a typical IM B12 injection
- Prescribed B12 medication
- Correct syringe and needle (as directed—length/gauge matter for IM)
- Alcohol swabs or skin prep as instructed
- Sharps disposal container
- Clean surface and gloves if recommended
- Bandage or gauze (if needed)
Why setup quality improves outcomes
I’ve seen people rush once the needle is in hand. That’s when small mistakes happen: using the wrong syringe, touching the needle tip, or skipping the recommended time for skin prep to dry. A calm, staged setup is one of the most effective “safety multipliers” for technique.
Choosing the IM injection site: the practical rule is “follow the map in your instructions”
For IM B12, clinicians commonly use sites like the deltoid (upper arm) or the ventrogluteal/vastus lateralis regions, depending on the individual, injection volume, and training. The exact site you should use should come from your clinician’s instructions.
The reason I’m emphasizing “follow the map” is simple: injection sites aren’t arbitrary. They’re chosen to avoid sensitive structures and to place the medicine into muscle.
How I coach site confidence
- Mark your landmarks before you uncap anything (with visual guidance from the instructions you were given).
- Choose a comfortable position so the muscle is relaxed; tense muscle makes technique harder and can increase soreness.
- Use a consistent approach from session to session—if you always “try to eyeball it,” your placement can drift.
Step-by-step: what safe, correct IM technique looks like at home
This section describes the general workflow used for IM injections. Your clinician’s instructions for your specific product, needle type, and site always take priority.
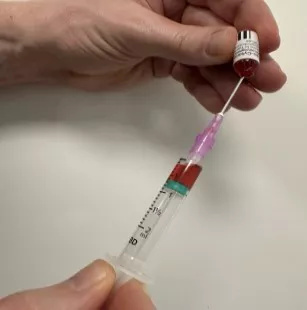
1) Prepare the medication and syringe
- Check the vial/ampoule label for medication name and dose.
- Use aseptic handling (don’t touch the needle tip; follow the exact draw-up method described to you).
- Confirm the dose volume in the syringe is exactly what you were prescribed.
In my hands-on experience: dose-volume errors are rarer than site errors, but they’re just as preventable. A quick visual confirmation of the drawn volume before you proceed saves headaches later.
2) Clean the skin
- Swab the intended site and allow the skin to dry as instructed (wet skin prep can increase discomfort and reduce effectiveness).
3) Inject into muscle using the clinician-recommended angle and depth
- Hold the syringe as instructed for IM technique.
- Insert the needle quickly and smoothly (hesitation can increase pain).
- Deliver the medication at a controlled pace.
Needle angle and depth depend on needle length and site. That’s why I strongly recommend you stick to the method your training covered rather than copying angles from generic guides.
4) Withdraw and apply gentle pressure
- Remove the needle smoothly.
- Apply gentle pressure with gauze/bandage if needed.
- Avoid rubbing aggressively; that’s a common cause of extra bruising and prolonged soreness.
5) Dispose of sharps immediately
- Place the needle and syringe straight into your sharps container.
- Never recap unless your clinician specifically instructed a recapping method consistent with safety guidance.
Common issues I’ve seen (and how to prevent them)
- Bruising and soreness: often tied to re-choosing the site without consistent landmarks, injecting through a poorly dried skin prep, or rubbing the area afterward.
- Fear-driven technique changes: people often slow down at needle insertion, which increases pain. Practicing the steps without a needle (setup and positioning) helps.
- Inconsistent site placement: the “map” matters more than confidence. If you’re not 100% sure, don’t guess—get caregiver/clinician help for the next dose and ask for a re-check of landmarks.
When not to self-inject (get help instead)
Seek assistance from a nurse, clinician, or trained caregiver if you experience any of the following:
- You’re unsure your prescription says IM (vs another route).
- You can’t confidently identify the injection site.
- You have significant difficulty performing the steps safely (vision, mobility, or needle-handling constraints).
- Persistent severe pain, spreading redness, or signs of infection after an injection.
FAQ
Are B12 injections intramuscular for everyone?
Not necessarily. Many B12 injections are given intramuscular, but the correct route depends on the exact product and what your prescription and training specify. Always follow the route written for your dose.
What’s the safest way to learn IM injection technique for home use?
I recommend you start with hands-on training from a clinician or nurse who shows the correct site for you, checks your needle handling, and has you demonstrate with instruction. When I’ve seen people succeed long-term, it’s because they practiced the workflow until it became consistent.
What should I do if I accidentally inject into the wrong area?
If you’re unsure of placement or you develop concerning symptoms (worsening pain, swelling, redness, or other abnormal effects), contact your clinician promptly for guidance. Don’t “try again” with the next dose early unless you’re told to by your prescriber.
Conclusion: your next practical step
Because are b12 injections intramuscular is really about correct route and placement, the safest path is to make the process consistent: confirm your prescription route is IM, use the exact injection site your clinician trained you on, and follow a calm, checklist-based workflow from skin prep to disposal.
Next step: If you haven’t already received injection-site training, schedule a brief nurse/clinician session to demonstrate your exact site and depth for your specific B12 dose before your next injection.
Discussion